
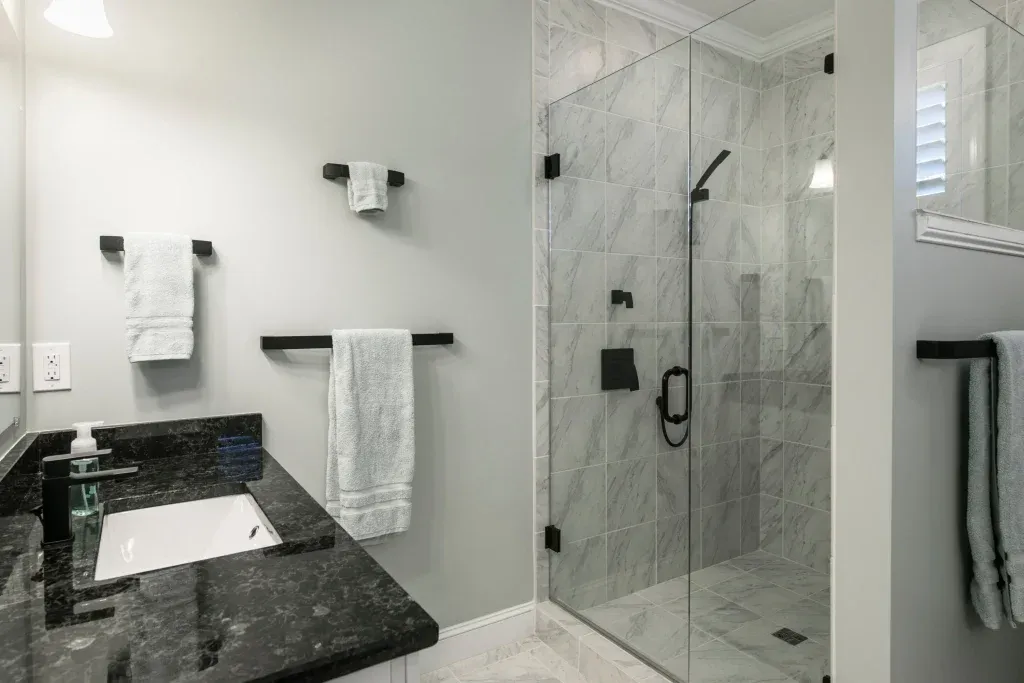
- What should you consider before a tub to shower conversion?
- What plumbing changes are needed for a tub to shower conversion?
- Why is waterproofing essential in a tub to shower conversion?
- What are the best materials for a tub to shower conversion?
- How much does a tub to shower conversion cost and is it worth it?
- Should you hire professionals for a tub to shower conversion?
The evolution of residential bathroom design has taken a dramatic turn over recent years. Gone are the days when a bulky, high-walled combination bathtub was considered the pinnacle of domestic luxury. Today, homeowners prioritize efficiency, accessibility, and spa-like wellness. They are replacing unused soaking vessels with expansive, custom-tiled walk-in enclosures. A tub to shower conversion is the ultimate expression of this modern design philosophy, transforming a purely utilitarian washroom into a personalized sanctuary.
However, stripping away a fiberglass or cast-iron tub to install a custom shower is a massive undertaking. It is a highly technical remodeling project that demands absolute precision, a deep understanding of residential building codes, advanced plumbing knowledge, and an uncompromising approach to waterproofing. A poorly executed project will not just look bad; it will actively destroy your home through hidden water damage and toxic mold growth. Conversely, a professionally engineered system will provide a lifetime of maintenance-free performance, elevate your daily routine, and significantly increase the market value of your property.
This comprehensive guide dissects every structural, mechanical, and aesthetic layer required to successfully convert an outdated bathtub alcove into a modern, watertight, and visually stunning architectural feature.
Assessing Spatial Requirements and Structural Integrity
Before a single sledgehammer swings, a rigorous assessment of your existing bathroom footprint is absolutely mandatory. The success of a tub to shower conversion hinges entirely on understanding the physical limitations and structural realities of your current space. You must verify that the resulting enclosure will meet local building codes while providing a comfortable, ergonomic experience.
The Geometry of Comfort
Most standard residential alcove bathtubs measure 60 inches in length and between 30 to 32 inches in width. While this footprint provides an excellent starting canvas for a spacious shower, careful calculations are required. The International Residential Code mandates a minimum interior shower dimension of 30 inches by 30 inches. However, industry standards and seasoned design professionals universally recommend an absolute minimum footprint of 36 inches by 36 inches to allow for comfortable, uninhibited movement.
Because you are converting a standard 60-inch alcove, the length of the new shower is rarely an issue. The critical dimension to watch is the depth. If your existing tub alcove is only 30 inches wide, you must carefully calculate the thickness of your new wall substrates, the waterproofing membranes, the thinset mortar bed, and the final surface tile. These materials can easily consume up to two inches of your available width, potentially pushing your finished, usable space below the optimal comfort threshold.
Subfloor Deflection and Load Bearing
During this initial assessment phase, you must also evaluate the condition of the subfloor and the underlying structural framing. Bathtubs are designed to distribute their immense weight (especially when filled with water) over a large, continuous surface area. When you transition to a custom shower, particularly one featuring heavy large-format porcelain tiles, natural stone slabs, or a thick dry-pack mortar bed, the structural dead load requirements change dramatically.
You must inspect the exposed floor joists once the tub is removed. They must be structurally sound, completely free from historical water rot, and capable of supporting the new shower pan without any deflection or vertical movement. The tile industry standard requires a floor deflection rating of no more than L/360. Any movement, sagging, or bouncing in the subfloor will inevitably lead to cracked grout lines, fractured tiles, and compromised waterproofing seals. In many older homes, contractors must install sister joists or add blocking to stiffen the floor before the new shower pan can be safely constructed.
Advanced Moisture and Ventilation Management
Environmental management within the bathroom is another critical factor. A large, multi-head walk-in shower generates a significantly higher volume of ambient steam and airborne moisture than a standard tub combination. Upgrading your existing ventilation system is a mandatory component of this conversion. Installing a high-capacity, ultra-quiet exhaust fan ensures that excess humidity is rapidly extracted from the room, preventing long-term moisture damage to your drywall, trim, and ceiling paint.
The exhaust fan must be carefully calculated based on the room’s cubic footage (measured in Cubic Feet per Minute, or CFM) and must be vented directly to the exterior of the building through the roof or a side wall. Venting a bathroom exhaust fan into an enclosed attic or crawlspace is a severe building code violation that will result in catastrophic mold proliferation.
Navigating Complex Plumbing and Drainage Upgrades
The transition from a bathtub to a walk-in shower requires fundamental, ground-up modifications to your bathroom’s rough plumbing infrastructure. This is the stage where the mechanical requirements for a shower diverge drastically from those of a traditional tub, requiring specialized knowledge and precision.
Upgrading the Drainage Capacity
The most critical plumbing upgrade involves the primary drainage system. Standard residential bathtubs are typically plumbed with a 1.5-inch diameter drain pipe. This smaller size is perfectly sufficient for a tub because the vessel itself acts as a large holding tank, allowing the water to drain slowly over time without overflowing into the bathroom.
A walk-in shower completely lacks this deep holding capacity. Water must evacuate the shallow shower pan immediately as it falls from the fixtures. Therefore, universal plumbing codes require a shower drain pipe to be a minimum of 2.0 inches in diameter. Failing to upgrade the drain pipe from 1.5 inches to 2.0 inches is a critical error that will result in constant standing water, slippery and dangerous floor surfaces, and the rapid accumulation of soap scum.
Upgrading this pipe requires cutting deep into the subfloor, accessing the main plumbing branch line, and installing a new 2-inch P-trap and drain riser. In older structures, particularly those undergoing extensive bathroom remodeling Chicago projects, you may encounter obsolete galvanized steel, lead, or cast iron pipes. Adapting modern PVC or ABS pipes to these legacy systems requires specialized mechanical couplings and a thorough understanding of plumbing venting requirements to prevent dangerous sewer gases from siphoning into the home.
Relocating the Drain Assembly
In addition to increasing the pipe size, the physical location of the drain usually needs to be shifted. Bathtub drains are heavily offset to one side, located directly below the overflow valve and the tub spout. While it is technically possible to design a custom shower with a heavily offset drain, a center drain configuration or a sleek linear drain positioned against the back wall often provides superior water management and a much more balanced visual aesthetic. Relocating the drain requires significant subfloor modification and precise pipe pitching (a minimum of 1/4-inch drop per foot of pipe) to ensure gravity pulls the water efficiently toward the main sewer stack.
Modernizing Supply Lines and Mixing Valves
The water supply lines and the shower mixing valve must also be completely updated. When a tub is removed, the low-positioned tub spout pipe is permanently capped off or removed. The main mixing valve behind the wall, which controls the water temperature and pressure, must be entirely replaced.
Modern building codes require the installation of pressure-balancing or thermostatic mixing valves. These advanced valves are essential life-safety devices; they automatically adjust the hot and cold water mix to protect users from sudden, dangerous temperature scalding caused by pressure drops elsewhere in the house (like a flushing toilet or a running washing machine). This stage is also the optimal time to route additional PEX or copper supply lines if you plan to install a luxurious, high-volume multi-head shower system featuring an overhead rain canopy, a handheld wand on a slide bar, and massaging body sprays.
The Absolute Imperative of Unbroken Waterproofing
If there is one solitary, unbreakable rule in the remodeling industry, it is that water will always find the path of least resistance. In a custom shower conversion, the waterproofing system is the absolute most critical component. It is the only barrier standing between the daily deluge of water and the structural destruction of your home’s framing.
A common misconception among homeowners is that tile and grout are waterproof. They are not. Tile and grout are completely porous, decorative wear surfaces. Without a meticulously installed, unbroken membrane beneath the tile, capillary action will draw moisture directly through the grout lines and into the vulnerable wall cavities and wooden subfloor.
Historically, shower waterproofing relied on layers of heavy tar paper, metal wire lath, and thick beds of Portland cement mortar. While these traditional “mud” systems can be highly effective when installed by a master artisan, they have largely been superseded by modern, highly engineered chemical membranes that offer superior protection, faster installation times, and advanced vapor management. Today, contractors rely on three primary methodologies for creating a watertight shower envelope.
Liquid-Applied Elastomeric Membranes
These advanced systems consist of rubberized synthetic polymers that have the consistency of thick paint. The liquid is applied directly over a stable substrate, such as fiber-cement board, using a heavy nap roller or a wide brush. It requires multiple coats, each applied at a specific thickness measured in mils, to achieve complete waterproofing.
The primary advantage of a liquid membrane is its ability to create a truly seamless, monolithic rubber shell. Because it is brushed on, it effortlessly conforms to complex architectural features, custom built-in niches, and integrated shower benches without the need for folding or cutting thick sheets of material.
Sheet Membranes
Sheet membranes are manufactured from pliable polyethylene plastic bonded to a fleece webbing on both sides. This fleece allows the plastic sheet to be securely embedded into a layer of wet thinset mortar applied over standard drywall or cement board.
The key benefit of a sheet membrane is its guaranteed, uniform thickness. Unlike liquid membranes, which rely on the installer applying the correct amount of fluid, a sheet membrane provides an exact, factory-calibrated barrier against moisture. Furthermore, these membranes offer exceptional vapor barrier properties, making them ideal for high-use showers or residential steam rooms. Another major advantage is speed; once the sheet is embedded and the seams are sealed with waterproof banding, the tile installation can begin immediately, without waiting for chemical curing times.
Extruded Foam Core Boards
The most modern innovation in shower waterproofing is the lightweight, extruded polystyrene foam core board. These rigid panels are coated on both sides with a fiberglass-reinforced cementitious layer.
The massive advantage of foam boards is that the core of the board itself is 100 percent waterproof. The installer simply screws the panels directly to the bare wooden wall studs, completely eliminating the need for heavy, cumbersome cement board. Once the panels are hung, the seams and fastener penetrations are sealed with specialized waterproof joint sealant or membrane tape. This method is incredibly fast, highly reliable, and significantly reduces the physical strain on the installation crew.
The Shower Pan Setup and Flood Testing
Regardless of the chosen wall membrane method, the shower pan must be executed flawlessly. The floor must feature a precise structural slope of exactly 1/4-inch per foot, directing every single drop of water precisely into the drain assembly. Modern remodeling relies heavily on prefabricated, high-density foam shower trays that have this critical pitch factory-engineered into the material. These engineered trays eliminate the guesswork and intense manual labor required to pack and slope a traditional dry-mortar bed, ensuring absolute mathematical precision in the drainage slope.
Once the entire waterproofing envelope is installed (both walls and floor), a professional contractor will perform a mandatory, 24-hour flood test. The drain is temporarily plugged with a pneumatic rubber test ball, and the shower pan is filled with two inches of water. The exact water level is marked and the space is left undisturbed. If the water level drops even a fraction of a millimeter after 24 hours, the waterproofing system has failed. The leak must be identified, isolated, and permanently repaired before a single piece of tile is allowed to be set.
Selecting Durable and Aesthetic Surface Materials
With the mechanical plumbing and the critical waterproofing infrastructure thoroughly verified, the project transitions to the visible finishes. The materials you select for your shower walls and floor will dictate the room’s entire aesthetic ambiance, define the daily maintenance and cleaning requirements, and heavily influence the overall safety of the space.
Engineering Safety on the Shower Floor
For the shower floor, physical safety is the paramount concern. Large format tiles should absolutely never be used on a standard, bowl-sloped shower pan. A large tile cannot bend to follow the contours of a center-drain pitch, which will result in sharp, raised edges (known as lippage) that pose a severe cutting hazard to bare feet.
For standard center drains, the floor tile must be small – typically two inches by two inches, or even smaller penny rounds or mosaics – and mounted on a flexible fiberglass mesh backing. This small size allows the tile sheet to drape and conform perfectly to the bowl-like slope of the pan. More importantly, the extensive, dense grid of grout lines provided by small tiles offers crucial physical traction for wet, soapy feet. When selecting any floor tile, you must look for products with a high Dynamic Coefficient of Friction (DCOF) rating to ensure maximum slip resistance.
The only exception to this rule is if you are installing a linear drain system. Because a linear drain requires only a single-plane slope (pitching uniformly in one direction rather than sloping from all four sides toward the center), you can safely carry large-format wall tiles directly onto the shower floor, creating a stunning, seamless transition.
Wall Tile Selection and Grout Considerations
For the shower walls, large format porcelain tiles are highly recommended by industry professionals. Porcelain is incredibly dense, fired at extreme temperatures, highly resistant to water absorption, and exceptionally durable against impacts.
Using large tiles drastically reduces the total surface area of grout required in your shower. Grout is undeniably the weakest link in any tile installation. Traditional cementitious grout is highly porous; it requires regular chemical sealing, acts as a magnet for soap scum and body oils, and serves as the primary breeding ground for mildew. By minimizing grout lines through the use of massive porcelain slabs, you significantly reduce the long-term maintenance burden. Furthermore, upgrading from standard cement grout to advanced, stain-proof epoxy grout will render your shower walls practically impervious to discoloration and chemical degradation.
The Impact of Glass Enclosures
The final material consideration is the glass enclosure system. A high-quality, custom glass setup transforms a dark, closed-off alcove into an expansive, light-filled architectural feature.
Framed enclosures feature aluminum framing around every individual piece of glass. They are structurally robust and highly effective at containing water spray, but the metal tracks at the bottom can accumulate hard water stains, soap scum, and mineral deposits over time, requiring diligent cleaning.
Frameless enclosures utilize heavy, thick tempered safety glass suspended by heavy-duty brass hinges and minimalist structural clips. They offer an ultra-modern, high-end aesthetic and are incredibly easy to clean due to the complete lack of metal channels. Because they rely on the sheer weight and precision cutting of the glass for stability, they require exact measurements and professional installation.
Alternatively, some modern designs utilize a simple splash panel. This is a single, fixed pane of glass covering only the portion of the shower immediately adjacent to the showerhead, leaving the entry completely open. This configuration creates a true European wet-room feel but requires meticulous drainage planning and specialized floor pitching to prevent water from splashing onto the main bathroom floor.
Financial Investments and Return on Investment Metrics
Converting a standard bathtub into a custom walk-in shower is a significant capital improvement to your residential property. It requires the seamless coordination of multiple skilled trades, including demolition crews, licensed plumbers, tile setters, and custom glass fabricators. Understanding the granular financial breakdown of this project is essential for establishing a realistic budget and avoiding unexpected financial strain mid-construction.
The total cost of a tub to shower conversion fluctuates wildly based on your geographic location, the age of your home, the extent of structural repairs required, and the luxury level of the finishing materials selected. A basic, prefabricated fiberglass or acrylic insert conversion performed by a high-volume contractor might sit at the lower end of the financial spectrum. However, a fully custom, site-built tile shower featuring a poured pan, imported Italian porcelain, frameless low-iron glass, and upgraded thermostatic plumbing fixtures will require a substantially higher upfront investment.
A typical mid-to-high range custom conversion budget is roughly allocated as follows. Demolition, structural framing repair, and heavy waste disposal account for roughly 15 percent of the total cost. Rough plumbing adjustments, including cutting the concrete or wood subfloor for the new 2-inch drain line and the complex mixing valve installation, consume about 25 percent. The advanced waterproofing system and the meticulous labor required to install and flood-test it represent another 15 percent. Surface materials, including the porcelain tile, modified thinset mortar, and epoxy grout, make up 15 percent. The custom fabricated frameless glass enclosure will require approximately 10 percent of the budget. The remaining 20 percent covers the highly specialized, artisanal labor of the tile setter and the overarching project management fees.
When evaluating the financial impact, it is vital to consider the long-term Return on Investment (ROI). In the current, highly competitive real estate market, master bathrooms heavily influence potential buyer decisions. A large, impeccably designed, spa-like walk-in shower is overwhelmingly preferred over a standard builder-grade combination tub. Real estate appraisal data consistently demonstrates that high-quality bathroom remodels recoup a massive percentage of their initial construction cost at the time of the property’s sale.
However, there is one crucial caveat regarding overall property value and marketability. If the bathtub you are planning to convert is the only bathtub in the entire house, you must proceed with extreme caution. While modern adult buyers overwhelmingly prefer daily showers, young families with small children absolutely require a functional bathtub. Removing the sole tub in a three-bedroom suburban home can instantly alienate a significant demographic of potential buyers, inadvertently narrowing your target market and potentially decreasing the home’s broad appeal. If your home features a secondary hallway or guest bathroom that retains a functional tub, you can confidently proceed with converting the primary suite’s tub into a luxury shower.
The Dilemma: DIY Execution vs. Professional Partnerships
As remodeling television shows and quick internet tutorials continue to surge in popularity, many ambitious homeowners are tempted to tackle complex renovations themselves in an effort to save on expensive labor costs. While painting a bedroom, swapping out cabinet hardware, or even installing floating laminate floors are excellent weekend DIY projects, a custom tub to shower conversion simply does not fall into that category.
The primary, overarching danger of a DIY shower conversion is the invisible nature of catastrophic failure. If you make a mistake when cutting baseboards or painting trim, the error is immediately visible and easily corrected with a little filler or a second coat. If you make a microscopic error in folding a waterproofing membrane corner, or if you fail to achieve a perfect, mathematically correct slope in the dry pack mortar pan, the mistake remains completely hidden beneath beautiful layers of tile.
You will not know the critical system has failed until months or even years later, when the floor joists begin to rot away, mold begins growing inside the wall cavities, or brown water stains appear on the drywall ceiling of the living room below. At that point, the entire shower must be violently demolished and rebuilt entirely from scratch, costing exponentially more than hiring a qualified professional initially. Furthermore, plumbing modifications of this scale mandate strict municipal building permits and formal city inspections. Moving main drains and tapping into critical vent stacks must be executed according to rigid local codes to ensure public health and safety.
When you make the wise decision to seek professional assistance, your selection process must be rigorous and uncompromising. Instead of simply jumping onto a search engine and broadly looking for remodeling contractors near me, you must act as a thorough investigator. You are looking for dedicated bathroom specialists, not handymen or generalists.
During the consultation phase, ask potential contractors highly technical questions about their underlying methodologies. Ask them if they guarantee a 24-hour flood test on their shower pans before setting tile. Ask them to clearly explain capillary action and exactly how their chosen waterproofing system combats it. Ask if they use advanced epoxy grout or standard cementitious grout.
A true remodeling professional will be eager and excited to discuss their waterproofing strategy and will clearly outline their structural approach to your specific home. They will provide a detailed, itemized scope of work that specifically lists the exact brands of membranes, thinsets, and plumbing valves they intend to install. By combining your new, deep understanding of drainage dynamics, structural integrity, and material science with the precise execution of a vetted contractor, you guarantee that your tub to shower conversion will be a permanent, beautiful, and flawless architectural upgrade to your home.